Remodeling a bathroom is one of the most rewarding home improvement projects. Whether you're upgrading a powder room, a master ensuite, or a family bathroom, a well-executed remodel enhances property value, aesthetic appeal, and daily comfort. Here is the ultimate guide on how to start a bathroom remodel, crafted to ensure every step of your journey is planned, efficient, and successful.
1. Define Your Bathroom Remodeling Goals
Before swinging a hammer, it's crucial to establish a clear remodeling vision. Ask yourself:
Do you need more space or better functionality?
Are you aiming for a modern, luxurious, or traditional style?
Is this remodel driven by necessity (e.g., leaks, mold) or aesthetics?
Make a list of must-haves vs. nice-to-haves. Think about:
Walk-in showers
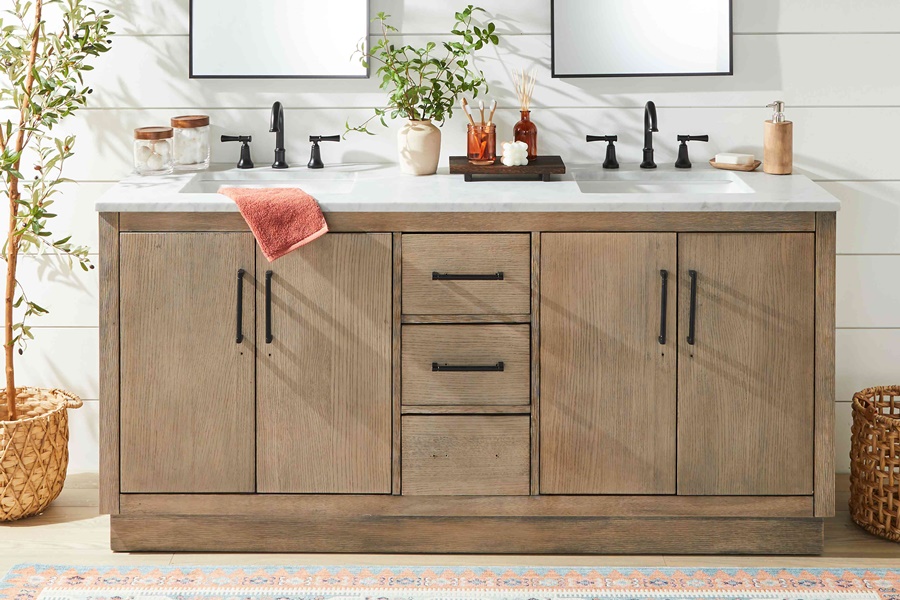
Double vanities
Heated flooring
Freestanding bathtubs
Eco-friendly fixtures
This will guide the entire project and help in budgeting and material selection.
2. Establish a Realistic Budget
Setting a budget is more than just deciding on a number. Break it down into categories:
Demolition and Disposal
Plumbing and Electrical
Fixtures and Fittings (toilets, vanities, sinks)
Flooring and Tiling
Lighting
Labor Costs
Unexpected Expenses (set aside at least 10-15% for contingencies)
Always get multiple quotes from contractors and suppliers. Understand the cost vs. value of every item and keep a detailed spreadsheet.
3. Plan the Layout and Functionality
Functionality should dictate design. Analyze your current bathroom layout and decide:
Should the toilet or shower move?
Can you convert a tub into a walk-in shower?
Is there enough storage?
Are there ways to improve traffic flow?
Consider the classic plumbing triangle: toilet, sink, and shower/tub. Keeping these close to their current positions reduces plumbing costs.
Use digital planning tools or consult with a bathroom designer to visualize the space in 3D.
4. Select High-Quality Materials and Finishes
Choose materials that are durable, moisture-resistant, and timeless. Some of the best materials for bathrooms include:
Porcelain or ceramic tile (for floors and walls)
Quartz or granite countertops
Solid wood or PVC vanities
Tempered glass for showers
Brushed nickel or matte black hardware for a modern look
Avoid trends that may quickly date the room. Instead, prioritize classic, neutral finishes that can evolve with decor updates.
5. Hire the Right Professionals
Unless you're a highly experienced DIYer, a bathroom remodel often requires a team:
General Contractor
Plumber
Electrician
Tile Installer
Cabinetry Specialist
Check references, view portfolios, and verify licenses and insurance. Request a detailed written estimate and ensure the contractor understands your vision and timeline.
For complex jobs, an interior designer can also help align aesthetics with function.
6. Obtain Permits and Follow Local Codes
Most municipalities require permits for:
Moving or replacing plumbing
Installing new electrical wiring
Structural changes
Failure to obtain permits can result in fines, insurance issues, or problems selling your home. Your contractor should assist with this process, but it's your responsibility to ensure all legal requirements are met.
7. Create a Detailed Project Timeline
Timelines prevent delays and confusion. Outline each phase:
1. Design Finalization and Material Selection
2. Permit Approval
3. Demolition
4. Rough Plumbing and Electrical
5. Inspections
6. Drywall and Painting
7. Tiling and Flooring
8. Fixture Installation
9. Final Touches and Clean-up
Depending on the complexity, expect the remodel to take 3 to 8 weeks.
8. Begin with Safe Demolition
If you’re DIY-ing the demo, take proper precautions:
Shut off water and electricity
Use protective gear (gloves, goggles, respirator)
Dispose of debris responsibly
Be mindful of asbestos or lead-based paint in older homes. If in doubt, have the space tested before starting.
9. Upgrade Plumbing and Electrical Systems
A remodel is the perfect time to:
Replace outdated plumbing
Install water-efficient toilets and faucets
Add GFCI outlets for safety
Improve lighting with LED fixtures or dimmers
Upgrade to smart fans, mirrors, or heated towel racks
This is not an area to cut corners subpar plumbing or wiring can lead to costly repairs later.
10. Focus on Waterproofing and Ventilation
Water is your bathroom’s biggest enemy. Invest in:
Cement backer board behind tiles
Waterproof membranes for showers
Proper slope in floors for drainage
A high-efficiency exhaust fan to prevent mold and mildew
Good ventilation is critical. Consider installing a humidity sensor fan that turns on automatically.
11. Install Fixtures with Precision
Now comes the fun part. Install:
Toilets (prefer dual-flush or pressure-assisted)
Vanities with ample storage
Sinks (undermount or vessel)
Showerheads with adjustable settings
Tubs (if space allows)
Ensure everything aligns perfectly level surfaces, tight seals, and secure mountings are essential for longevity and appearance.
12. Add Finishing Touches
The little details bring the room together:
Frameless mirrors
Towel bars and rings
Shelving or recessed niches
Decorative lighting (sconces or pendants)
Coordinated color schemes for towels, rugs, and curtains
Don’t forget the importance of natural light—maximize it with frosted windows or skylights if possible.
13. Final Inspection and Punch List
Walk through your newly remodeled bathroom with your contractor:
Test all plumbing and electrical fixtures
Check for gaps in tile or grout
Ensure paint and caulking are clean and smooth
Note anything that requires touch-up
Don’t release the final payment until all agreed-upon work is completed to satisfaction.
14. Maintain Your New Bathroom
A remodel is an investment. Maintain its quality with:
Regular cleaning with non-abrasive products
Sealing grout annually
Monitoring for any signs of moisture issues
Keep warranties and receipts organized in case of future issues.
Conclusion
Starting a bathroom remodel can seem overwhelming, but with a detailed plan, quality materials, and the right team, it becomes a seamless transformation. From setting a vision to polishing the final tile, each step plays a crucial role in the success of your remodel.