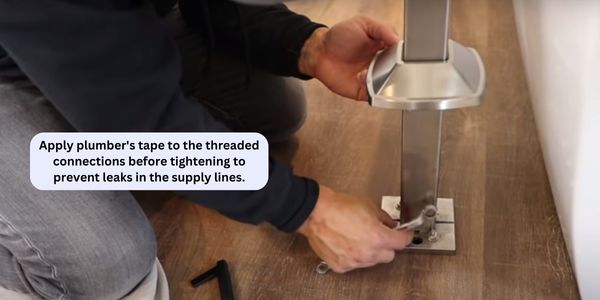
Freestanding tub fillers, also known as bathtub faucets, are primarily compatible with freestanding bathtubs. The traditional tub fillers are usually mounted on the wall, but it is unlike the traditional tub fillers and directly mounted on the floor, and then it is connected to the tub with the help of the hose. These are preferable for modern homes or those who want to achieve a sleek look. Different finishes and different styles are available in the freestanding tub fillers. Tub fillers give a luxury bathing experience.
Installation Process
Installation of tub filler is more challenging than the installation of other fixtures. Too many steps are involved, and it is crucial to anchor to the floor firmly. The presence of essential tools is necessary, and you must be aware of every step so it will be easy to install them correctly.
In this article, the installation process of freestanding tub filler is explained in every detail.
Preparation of Tub and Plumbing

Before the installation, the tub will be in good condition and adequately level. After preparing the tub then, get ready for the plumbing. Turn off the water supply lines and the primary connection of water. It is essential to disconnect the water connection.
Installation of Supply Lines

Supply lines are the hoses that come with the bathtub, or you can purchase them separately. Connect these hoses with the hot and cold supply lines and then connect them to the fillers.
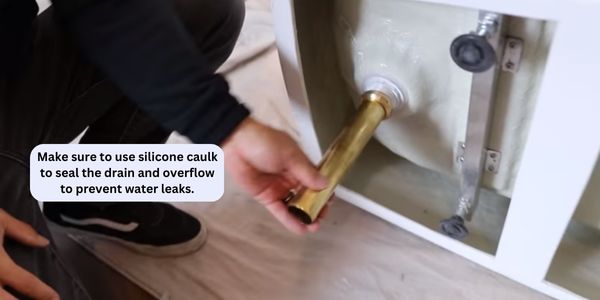
Install the Drain and Overflow

Only some tubs are present with already installed drains and overflow. If these two things are absent, they need to be installed. For this purpose, cut the hole on the bottom surface of the bathtub and to install the drain and the overflow.
Connect the Fillers

By connecting the hose, connect the fillers to the supply lines, which are linked to water. Connect the hose to the hot and cold-water supply lines.
Now Install the Spout

Supply lines and hoses are connected, and now install the spout. Attach the spout to the freestanding tub filler and tighten it in its place correctly. Now the installation is almost ready.
Turn on the Water

Now you are done with every critical step for the installation and turn on the water. After turning on the water, check the working of the freestanding tub filler and the chances of leakage. If there is any leakage, fix it at the right time.
First, get to know about the model of the freestanding tub filler. It is necessary to follow all of the steps mentioned above. It is better to read the instructions and guidelines as well. If you face any problem, consult with the experts to help and guide you.
Freestanding Tub Filler Installation Process FAQs
What tools do I need to install a freestanding tub filler?
Drills, wrenches, tape, and hammers are some essential tools. It is better to find a level and silicone caulk also.
How do I determine the location for the tub filler?
The center is the best location for the tub filler. It will be easy to access the tub filler. The tub filler should be near the freestanding bathtub.
Can I install a freestanding tub filler on my own?
Installation of freestanding tub filler is challenging. You must know about the plumbing and have the crucial tools for the installation if someone has doubts, so it is better to hire a plumber.
How long does the installation process typically take?
It may take one or more hours for the installation. If the procedure is complicated, then the process can be complicated. It also depends upon the experience of the installer.
Can I install a freestanding tub filler on any type of tub?
Freestanding tub fillers are suitable or can be installed with freestanding bathtubs. Make sure that the bathtub must be compatible with the tub filler.
What are some common problems that can occur during installation?
Outcomes are not always positive; different problems can occur during installation, such as leakage, connection problems, and water flow issues.
Pro Tip
Select the perfect location to install a freestanding tub filler and install the supply lines in the perfect position. Install the drain and overflow, and don’t forget to check the water pressure. You must check the instructions before the installation and turn off the water before the installation properly. After installation, test the working of the tub filler.
Conclusion
Freestanding tub filler is a straightforward process, and it is not hectic. You must pay attention and do every step according to the guidelines like hose connection, supply lines, water connection and many more. After following the guidelines, it will be possible to install the freestanding tub filler successfully in the last caulk around the tub filler base to prevent leakage. Now enjoy your bath and make it memorable.

