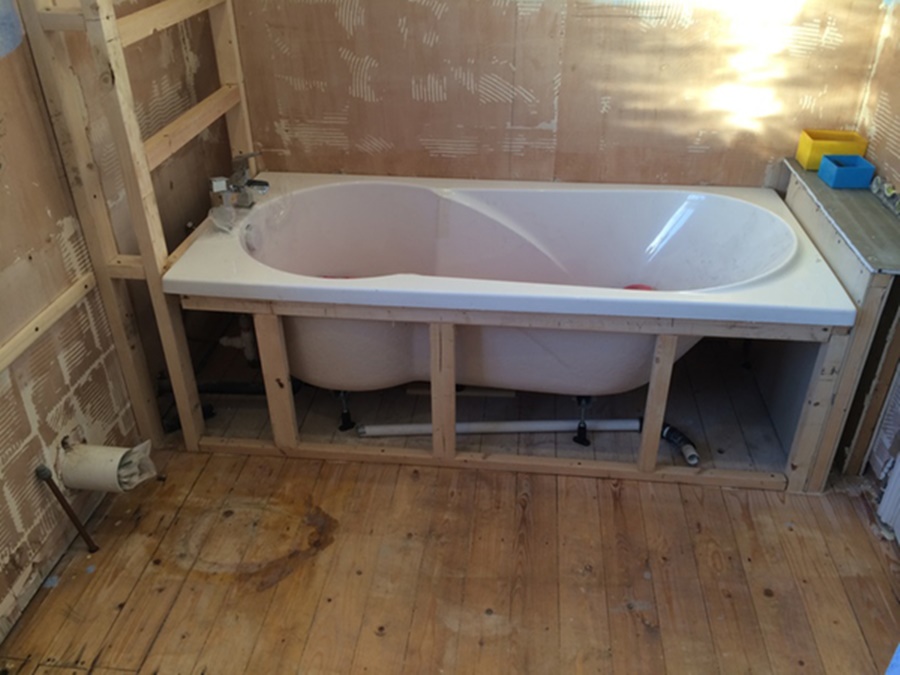
Installing a bathtub can dramatically improve the look, feel, and functionality of your bathroom. Whether you're replacing an old unit or performing a full remodel, understanding the detailed process is critical for a successful installation. Below, we present a comprehensive, professional guide on how to install a bathtub, suitable for both DIY enthusiasts and contractors.
Tools and Materials You Will Need
Before we begin the installation, gather the following essential tools and materials:
Safety gear (gloves, goggles)
Tape measure
Spirit level
Wrench set
Pipe wrench
Reciprocating saw
Drill and drill bits
Screwdriver
Caulking gun
Silicone caulk
Plumber’s putty
PVC primer and cement
Drain assembly kit
Overflow kit
Bathtub flange
Shims
Ledger board
2x4 lumber (if necessary)
Tile backer board (for alcove installations)
Bathtub (acrylic, cast iron, or fiberglass)
Step 1: Remove the Old Bathtub
Disconnect the Plumbing
Turn off the water supply. Open the taps to relieve any remaining pressure. Use a wrench to disconnect the drain and overflow assembly. Detach the water supply lines connected to the faucet.
Take Out the Old Tub
Carefully remove surrounding tiles or panels to access the flange. Cut through any adhesive or fasteners. Use a reciprocating saw if needed. Remove the bathtub slowly, taking care not to damage walls or flooring.
Step 2: Prepare the Installation Area
Inspect the Subfloor
Check for water damage or rot in the subfloor. Replace any weak or compromised sections. The subfloor must be clean, level, and structurally sound.
Install or Replace the Ledger Board
If your bathtub requires support, install a ledger board on the back wall where the tub lip will rest. This ensures the tub is evenly supported and helps prevent movement.
Measure the Space
Use a tape measure to confirm the tub fits snugly into the alcove or designated area. Account for tile or wallboard thickness if installing in a finished room.
Step 3: Dry Fit the Bathtub
Place the tub in position to ensure proper fit. Check that the drain hole aligns with the existing plumbing. Use a level to make sure the bathtub sits evenly. Use shims as needed to adjust alignment.
Step 4: Install the Drain Assembly
Apply plumber’s putty around the underside of the drain flange. Insert it into the drain hole. Attach the gasket and locknut from underneath. Tighten securely. Install the overflow components according to manufacturer instructions, using silicone or provided gaskets to ensure a watertight seal.
Step 5: Connect the Plumbing
Use PVC primer and cement to connect the P-trap to the existing drain line. Align the overflow and drain assembly with the plumbing. Double-check that all connections are watertight. Reconnect the water supply lines and ensure valves are closed.
Step 6: Secure the Bathtub in Place
Apply Adhesive or Mortar Bed (If Required)
Some tubs, especially acrylic or fiberglass, require a mortar bed for support. Spread the mortar evenly where the tub will sit. Lower the tub into place, ensuring it is firmly supported and level.
Screw the Flange to Studs
Use corrosion-resistant screws to attach the flange to the wall studs. Do not overtighten. Ensure the tub lip rests securely on the ledger board and is properly shimmed.
Step 7: Install the Surround or Tile Backer Board
If tiling, install cement backer board above the flange. Leave a slight gap between the board and tub lip, and fill it with flexible silicone caulk to prevent cracking.
For pre-formed surrounds, follow the manufacturer's instructions for mounting panels directly onto the studs or over drywall.
Step 8: Test for Leaks
Turn the water supply back on. Fill the bathtub halfway and check the drain, overflow, and supply connections for leaks. Drain the tub and inspect again. If everything is dry, proceed to the final step.
Step 9: Seal All Edges
Apply high-quality silicone caulk around all seams where the tub meets the wall and floor. Smooth the bead using a damp finger or caulk tool for a professional finish. Allow to cure for at least 24 hours.
Step 10: Final Touches
Install any remaining fixtures or trim.
Re-tile or finish the wall surfaces.
Clean the bathtub and surrounding area thoroughly.
Bathtub Installation Tips and Best Practices
Choose the Right Type of Bathtub
Popular options include alcove tubs, freestanding tubs, drop-in tubs, and corner tubs. Select one that suits your space, plumbing layout, and design preferences.
Verify Local Plumbing Codes
Always check local building regulations to ensure your installation complies with safety and code standards. In some areas, a licensed plumber may be required.
Plan for Access Panels
If the plumbing is located in a wall that can be accessed from another room, install a removable access panel for future maintenance.
Common Mistakes to Avoid
Not leveling the bathtub, which can cause improper drainage or cracks over time.
Skipping the mortar bed for acrylic tubs, leading to movement and noise.
Overtightening connections, which may strip threads or damage fittings.
Neglecting waterproofing, especially behind tile, resulting in mold or rot.
When to Call a Professional
While many skilled homeowners can handle a bathtub installation, we recommend hiring a professional plumber if:
You are relocating plumbing lines.
You have an older home with outdated plumbing.
The subfloor requires significant repair.
You're installing a cast iron or jetted tub (due to weight or electrical needs).
Conclusion
Installing a bathtub is a rewarding project that significantly enhances your bathroom's value and comfort. By carefully following each step from preparation to plumbing and sealing you ensure a secure, leak-free, and durable installation.

