
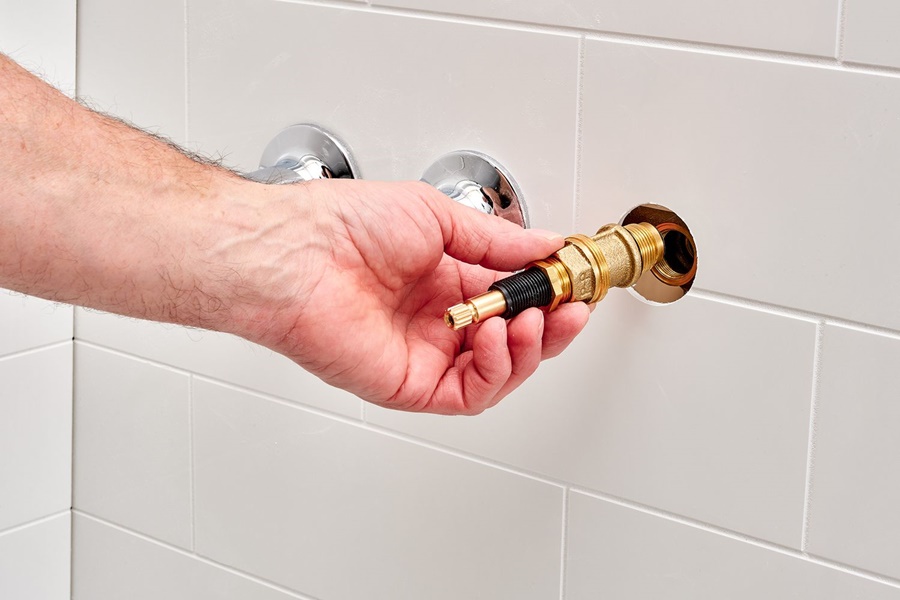
How to Replace a Bathtub Faucet Easily and Effectively involves a straightforward process that can be completed in under two hours with basic tools. Tackling leaks or upgrading the design of your bathroom is a manageable DIY project that can greatly improve your space. This guide provides step-by-step instructions to help you successfully navigate the replacement process.
Tools and Materials You Will Need
Before starting, gather the following essential tools and supplies to ensure a smooth process:
Adjustable wrench
Screwdriver (Phillips and flathead)
Allen wrench (if needed for set screws)
Plumber’s tape (Teflon tape)
Utility knife
Pipe wrench (optional)
Towels or rags
Bucket or bowl (to catch excess water)
Turn Off the Water Supply
Safety first. Always shut off the water supply before starting any plumbing task.
1. Locate the main water shut-off valve or the bathroom's individual shut-off valve.
2. Turn off both the hot and cold water supply.
3. Open the faucet to drain any remaining water and relieve pressure in the lines.
Remove the Old Bathtub Faucet
Step 1: Identify Faucet Type
There are typically two common types of bathtub spouts:
Slip-on spout: Secured by a set screw underneath.
Threaded spout: Screws directly onto the pipe.
Step 2: Remove Slip-On Faucet
1. Use a flashlight to locate the set screw underneath the spout.
2. Use an Allen wrench to loosen the set screw (turn counterclockwise).
3. Gently pull the spout off the copper pipe (stub-out pipe).
Step 3: Remove Threaded Faucet
1. Grip the spout with a wrench or channel-lock pliers (use a towel to prevent scratching).
2. Turn counterclockwise to unscrew the spout from the wall pipe.
3. Inspect the pipe for corrosion or damage.
Prepare the Pipe for New Installation
Clean the Pipe
Wipe the exposed pipe clean with a cloth.
Remove any old plumber’s tape or caulk with a utility knife.
Inspect Pipe Compatibility
Measure the length and diameter of the pipe.
Confirm that the replacement spout matches the type (slip-on or threaded).
Install the New Bathtub Faucet
Step 1: Apply Plumber’s Tape
For threaded spouts:
Wrap the threads of the pipe with plumber’s tape.
Wrap 2-3 times in a clockwise direction to ensure a tight seal.
Step 2: Attach the New Faucet
For threaded spouts:
Screw the new faucet onto the pipe by hand.
Use a wrench for a snug fit, but avoid overtightening.
For slip-on spouts:
Slide the faucet onto the copper pipe.
Align the set screw with the flat part of the pipe.
Tighten the set screw with an Allen wrench.
Seal and Test the Installation
Apply Silicone Caulk
Use waterproof silicone caulk around the base of the faucet to seal against moisture.
Smooth with a damp finger or caulking tool.
Restore Water Supply and Test
Turn the water supply back on.
Open the faucet and check for leaks around the base and pipe.
If leaks occur, tighten the faucet or reapply plumber’s tape as needed.
Troubleshooting Common Installation Issues
Leak Behind Wall
Indicates improper seal or pipe damage.
May require wall access and pipe repair.
Faucet Doesn’t Sit Flush Against Wall
Pipe may be too long or short.
Use an extension nipple or trim the pipe carefully.
Diverter Not Functioning Properly
Ensure diverter is compatible with your shower system.
A faulty diverter may need replacement or adjustment.
When to Call a Professional
If you encounter any of the following issues, it may be best to hire a licensed plumber:
Broken or corroded plumbing inside the wall
Difficulty removing rusted or seized faucets
Water pressure inconsistencies after installation
Leaks that persist after troubleshooting
Pro Tips for Long-Term Faucet Maintenance
Wipe down your faucet regularly to prevent mineral buildup.
Use mild cleaning agents to preserve finish and function.
Periodically check the tightness of the spout and integrity of caulking.
Recommended Faucet Brands for Long-Term Reliability
When choosing a replacement bathtub faucet, consider quality brands such as:
Moen
Delta
Kohler
Pfister
American Standard
These brands offer durable materials, attractive designs, and easy installation kits.
Common Mistakes to Avoid
One frequent error is neglecting to turn off the water supply completely. Double-check the shut-off valves and ensure no leaks occur during installation. Another mistake is skimping on plumber’s tape; use plenty to create a watertight seal, preventing future drips.
Over-tightening connections also leads to problems. You want a snug fit, but excessive torque can crack fittings. Always follow the manufacturer's recommendations for torque specifications.
Lastly, ignoring the compatibility of the new faucet with existing plumbing can lead to wasted time and money. Measure your current setup and carefully consult specifications before purchasing a replacement. For detailed instructions, see this guide on how to replace a bathtub faucet.
Cost Considerations
The cost of replacing a bathtub faucet varies widely based on several factors. Budget faucets can start around $40, while premium models may exceed $300. Consider both the initial price and potential longevity.
Labor costs add to the total if you hire a plumber. Typical rates range from $50 to $150 per hour, making self-installation an appealing option for those with basic DIY skills.
Remember to factor in extra materials like plumber’s tape, caulk, and tools. It’s wise to have a budget between $100 to $500 total when undertaking this type of project, depending on your faucet choice and expertise.
Conclusion
Replacing a bathtub faucet is a task that blends utility and aesthetics. By following the steps above with care and precision, homeowners can refresh their bathroom’s look, stop leaks, and ensure efficient water delivery for years to come. With a few tools, the right replacement parts, and a bit of patience, this project can be completed in under an hour by most DIY enthusiasts.