Installing or replacing plumbing for a bathroom sink might sound like a job for a professional, but with the right tools and some patience, it's something a competent DIYer can tackle. This guide will walk you through the entire process from preparation to final testing.
Tools and Materials You'll Need
Before getting started, make sure you have the following tools and materials on hand:
Tools:
Adjustable wrench
Pipe wrench
Pipe cutter (if needed)
Hacksaw
Plumber’s tape (Teflon tape)
Bucket or container
Tape measure
Level
Materials:
Sink with faucet and drain assembly
P-trap kit (usually includes trap arm and J-bend)
PVC or ABS drain pipe
Water supply lines (flexible hoses)
Shut-off valves (if not already installed)
Silicone sealant or plumber’s putty
Step 1: Shut Off the Water Supply
Before any plumbing work, turn off the water supply to the sink. You can usually do this via the shut-off valves under the sink. If they’re not present, you may need to shut off the main water supply.
Step 2: Install the Faucet and Drain on the Sink
It’s easier to install the faucet and drain before mounting the sink.
1. Mount the faucet according to the manufacturer’s instructions.
2. Apply plumber’s putty or silicone under the drain flange.
3. Insert the drain body into the sink hole and tighten the locknut underneath.
4. Connect the pop-up assembly (if your sink has one).
Step 3: Mount the Sink
Whether you're using a pedestal, wall-mounted, or vanity sink, follow the mounting instructions provided. Ensure it is level and secure.
Step 4: Connect the Water Supply Lines
1. Attach flexible water supply hoses to the faucet’s hot and cold inlets.
2. Connect the other ends to the shut-off valves.
3. Use Teflon tape on threaded connections to prevent leaks.
4. Tighten with a wrench, but avoid over-tightening.
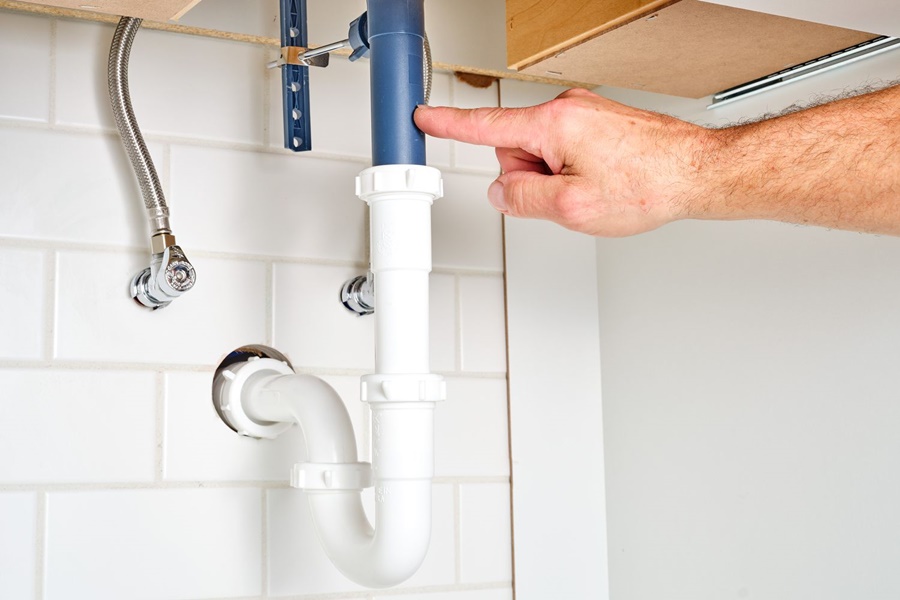
Step 5: Install the Drain Assembly (P-Trap)
The P-trap is a crucial part of the plumbing system it prevents sewer gases from coming back up.
1. Position the tailpiece (the vertical pipe from the drain) into the sink drain.
2. Connect the J-bend to the tailpiece using a slip nut and washer.
3. Attach the trap arm to the wall drainpipe using another slip nut and washer.
4. Ensure the J-bend and trap arm align correctly you may need to trim them.
5. Hand-tighten all slip nuts; they should be snug but not overtightened.
Step 6: Secure the Pipes and Check for Alignment
Use a level to check that the trap arm has a slight downward slope toward the wall drain.
The standard slope is about 1/4 inch per foot.
Ensure all components are lined up neatly and securely fastened.
Step 7: Test for Leaks
1. Turn on the water supply slowly.
2. Run water through the sink for a few minutes.
3. Check all connections water supply lines, drain, and P-trap for any leaks.
4. Tighten connections as needed or apply more Teflon tape if leaks persist.
Step 8: Finish and Clean Up
If everything is leak-free, wipe down all surfaces.
Seal any gaps around the sink base with silicone caulk.
Ensure that the pop-up drain functions properly, if installed.
Troubleshooting Tips
| Problem | Possible Cause | Solution |
|---|---|---|
| Leaky connections | Loose fittings or missing washers | Re-tighten or replace washers |
| Slow draining | Improper slope or blockage | Check trap alignment; clear obstructions |
| No water flow | Shut-off valves closed or supply issue | Ensure valves are fully open |
| Sewer smell | Missing or dry P-trap | Reinstall or fill trap with water |
Conclusion
Plumbing a bathroom sink is a manageable DIY project with the right preparation and tools. By following the steps above carefully, you can save money and gain the satisfaction of completing the job yourself. Just remember to double-check all connections and test thoroughly before calling it done.