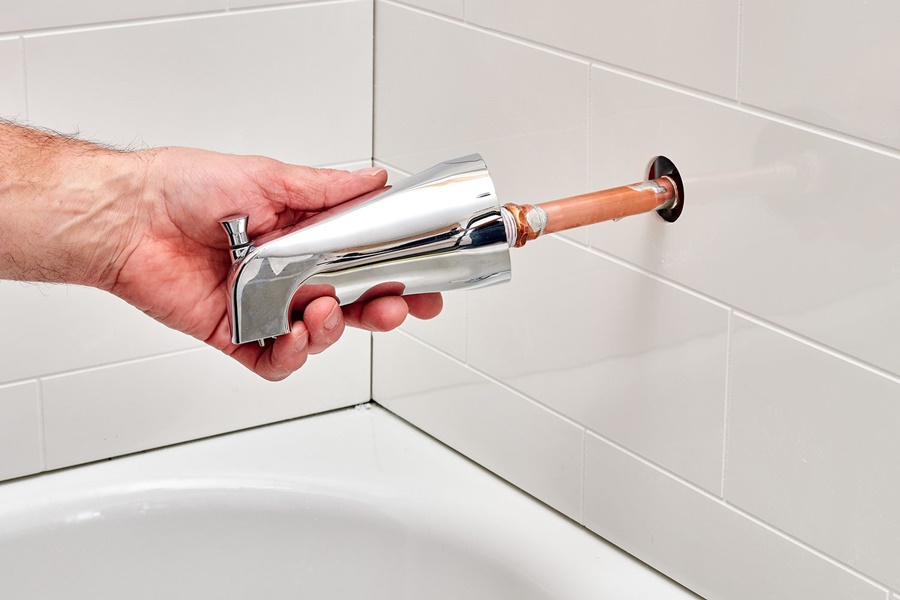
A leaking, outdated, or malfunctioning bathtub faucet can be a nuisance and lead to water waste. Replacing or repairing it doesn't have to require a plumber. With the right tools and instructions, you can remove a bathtub faucet yourself. This comprehensive guide walks you through the process step-by-step to ensure a clean, damage-free removal.
Tools and Materials You’ll Need
Before starting, make sure you have all necessary tools and supplies ready to avoid interruptions mid-process.
Adjustable wrench
Flathead screwdriver
Phillips screwdriver
Allen wrench (hex key set)
Teflon tape
Cloth or towel
Vinegar (for cleaning)
Bucket or container (optional, for water drips)
Flashlight (for better visibility)
Turn Off the Water Supply
Before removing a bathtub faucet, it’s crucial to shut off the water supply to avoid flooding or accidental sprays.
1. Locate the main water shut-off valve in your home, usually near the water meter or in the basement.
2. Turn the valve clockwise until it stops. Open the bathtub faucet to ensure no water is flowing.
3. If your tub has individual shut-off valves under or near it, use those instead.
Determine Your Faucet Type
There are several types of bathtub faucets, and each may require slightly different removal techniques. The most common are:
Screw-on spout with a set screw
Slip-on spout with a set screw
Threaded spout without a set screw
Diverter tub spout
Understanding the type will ensure you don’t damage the pipe or wall during removal.
Remove a Slip-On Tub Spout
Slip-on spouts are held in place with a set screw underneath the faucet.
1. Look under the spout near the wall for a small hole.
2. Insert an Allen wrench and loosen the set screw (do not remove it completely).
4. Gently pull the spout straight out from the wall. If it’s stuck, wiggle it slightly to loosen the grip.
5. Once removed, inspect the pipe and clean any residue or buildup with vinegar and a cloth.
Remove a Screw-On Tub Spout
Screw-on spouts twist off from the pipe.
1. No set screw? You likely have a threaded spout.
2. Wrap a cloth around the faucet to protect it and use an adjustable wrench to grip the spout.
3. Turn the spout counterclockwise to unscrew it.
4. If it’s tight or rusted, apply gentle pressure and consider using penetrating oil for lubrication.
5. After removal, inspect the threads on the pipe and clean with a wire brush if needed.
Remove a Diverter Tub Spout
A diverter spout has a pull-up knob to switch water flow to a showerhead.
1. Identify if the spout is slip-on or screw-on by checking for a set screw.
2. Follow the same steps as above based on the type.
3. If removing due to malfunction, inspect the diverter valve mechanism for signs of wear, corrosion, or damage.
Clean and Inspect the Supply Pipe
Once the spout is off:
Inspect the copper or iron supply pipe extending from the wall.
Remove any old Teflon tape or plumber’s putty.
Clean mineral deposits with a vinegar-soaked cloth.
If you see cracks, corrosion, or damage, call a professional plumber before installing a new faucet.
Common Issues and Troubleshooting
Stuck Faucet Spout
If the faucet is stuck:
Spray WD-40 or a penetrating lubricant at the connection point.
Wait 10–15 minutes.
Use gentle twisting force to dislodge the faucet.
Stripped Set Screw
If the set screw is stripped:
Use a screw extractor tool.
Alternatively, drill the screw out carefully without damaging the pipe.
Broken Faucet Body
If the faucet breaks during removal:
Protect the pipe stub by covering it.
Use pliers or locking wrench to remove any remaining pieces.
Prepare for Faucet Replacement
After the faucet is removed:
Measure the length and diameter of the pipe nipple to ensure compatibility with your new faucet.
Apply Teflon tape to the threads (for threaded types) or prepare the slip-on area for smooth installation.
Clean the wall around the pipe to avoid mildew or debris behind the new fixture.
Maintenance Tips for Bathtub Faucets
To avoid future issues:
Clean the faucet monthly to prevent mineral build-up.
Don’t pull too hard on diverters or knobs.
Check for small leaks regularly to prevent pipe damage behind the wall.
When to Call a Professional
While DIY bathtub faucet removal is often straightforward, you should contact a licensed plumber if:
The pipe behind the wall moves or is loose.
You discover corrosion or leaking inside the wall.
The pipe is short, preventing proper installation of a new spout.
Safety Precautions
Always wear protective gloves and goggles.
Be cautious not to scratch or crack the tub or wall tile during removal.
Do not force tools if you encounter resistance assess the situation or seek professional help.
Conclusion
Removing a bathtub faucet is a manageable task for most homeowners with basic tools and preparation. By identifying your faucet type, using the correct technique, and following proper removal steps, you can replace or repair your bathtub faucet efficiently and safely. Regular inspection and maintenance ensure long-term functionality and water efficiency.

