Removing a faucet from a bathroom sink may seem daunting, but with the right tools, guidance, and a bit of patience, it can be a straightforward task. Whether you're replacing an old, leaky faucet or upgrading your bathroom's look, this comprehensive guide will walk you through how to remove a faucet from a bathroom sink with professional-level precision.
Tools and Materials You’ll Need
Before starting, gather the essential tools to ensure a smooth and hassle-free removal process.
Adjustable wrench or basin wrench
Channel-lock pliers
Screwdrivers (Phillips and flat-head)
Plumber’s putty or silicone caulk
Bucket or towel
Penetrating oil (like WD-40)
Flashlight
Gloves and safety glasses
Step 1: Turn Off the Water Supply
Locate the water shut-off valves under the bathroom sink. These are typically oval-shaped knobs connected to flexible supply lines.
1. Turn both the hot and cold water valves clockwise to shut off the water.
2. Turn on the faucet to release any remaining pressure and drain out water left in the lines.
Tip: If the shut-off valves are stuck, use penetrating oil and allow it to sit for a few minutes before trying again.
Step 2: Disconnect the Water Supply Lines
Place a bucket or towel under the sink to catch any water drips.
1. Use an adjustable wrench to loosen the nuts connecting the supply lines to the faucet.
2. Carefully detach both lines and set them aside.
Pro Tip: If your supply lines are old or corroded, consider replacing them with new, flexible braided lines.
Step 3: Remove the Drain Stopper Mechanism (If Applicable)
If your faucet is connected to a pop-up drain assembly, you’ll need to disconnect it to completely remove the faucet.
1. Locate the pivot rod attached to the drain tailpiece.
2. Unscrew or unclip the pivot nut and remove the rod from the tailpiece.
3. Pull out the lift rod from the faucet body.
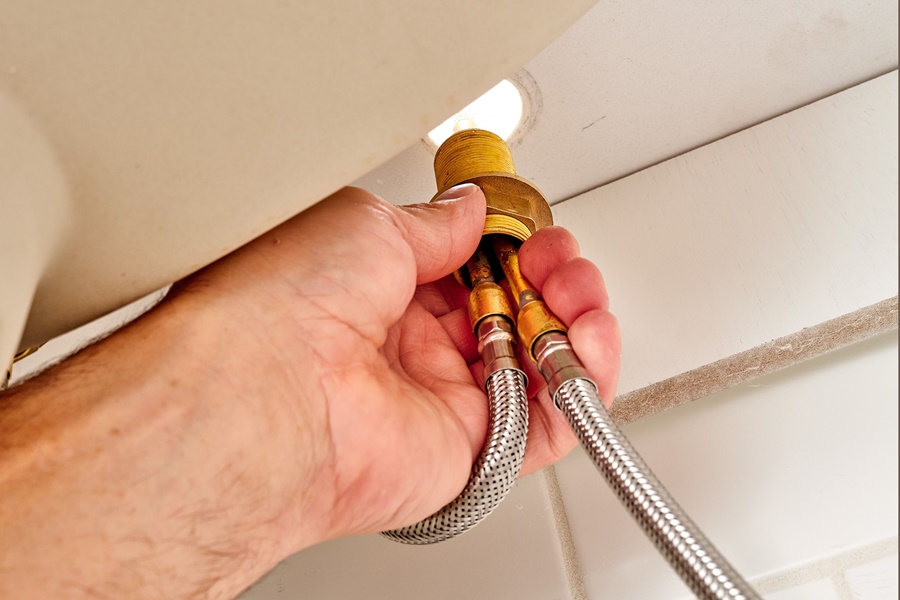
Step 4: Loosen the Faucet Mounting Nuts
Underneath the sink, locate the mounting nuts that secure the faucet to the sink or countertop. These are usually found at the base of the faucet shanks.
1. Use a basin wrench or channel-lock pliers to loosen the nuts.
2. If the nuts are rusted or stuck, apply penetrating oil and wait 10–15 minutes before attempting again.
Important: Be gentle to avoid damaging the sink or surrounding pipes.
Step 5: Remove the Faucet from the Sink
Once the mounting nuts are removed:
1. Go above the sink and lift the faucet straight up from its base.
2. If it's stuck due to hardened plumber’s putty or mineral deposits, wiggle it gently back and forth until it comes loose.
3. Clean the sink surface thoroughly using a non-abrasive cleaner to remove old sealant or grime.
Step 6: Inspect and Clean the Area
Before installing a new faucet or replacing components:
1. Wipe down the sink surface with a soft cloth.
2. Remove any remaining plumber’s putty, silicone residue, or mineral buildup.
3. Check for cracks or wear around the faucet holes.
This ensures a clean, level surface for your new faucet installation and prevents leaks in the future.
Special Cases: Dealing With Different Faucet Types
Removing a Centerset Faucet
Typically held in place by two or three nuts underneath.
Drain assembly and lift rod are often built-in and require removal as a unit.
Removing a Widespread Faucet
Each handle and spout has individual mounting nuts.
Disconnect each component separately before lifting them from the sink.
Removing a Single-Handle Faucet
Usually simpler but may have a hidden mounting nut under the faucet body.
Look for a decorative cap that can be popped off to access the screw.
Common Issues and Troubleshooting
Stuck Mounting Nuts
Apply more penetrating oil and allow time to soak.
Use a basin wrench for better leverage in tight spaces.
In extreme cases, use a mini hacksaw to carefully cut through the nut (last resort).
Water Supply Lines Won’t Budge
Ensure the wrench is properly fitted and turn slowly to avoid stripping the nuts.
Use heat (a hairdryer) to expand the metal slightly for easier loosening.
Hard Water Build-Up Around Faucet Base
Use a 1:1 solution of vinegar and water to dissolve mineral deposits.
Gently scrub with an old toothbrush or soft sponge.
Aftercare and Preparing for New Faucet Installation
Once the faucet has been removed:
1. Double-check all old components are removed, including rubber gaskets or washers.
2. Use a flashlight to inspect the faucet holes for debris or corrosion.
3. Keep all plumbing connections clean and dry before installing a new unit.
Optional Step: If you are planning to change the drain assembly as well, this is the perfect time to do it.
When to Call a Professional Plumber
While faucet removal is usually DIY-friendly, consider hiring a plumber if:
The shut-off valves are leaking or broken.
The faucet is embedded in rust or calcium buildup.
You’re dealing with complex or integrated plumbing fixtures.
Conclusion
Removing a bathroom sink faucet is a task well within reach for most DIY enthusiasts. With the right tools, proper safety precautions, and a clear, step-by-step plan, you can successfully remove even the most stubborn faucet. Whether you're preparing for a faucet upgrade or doing routine maintenance, this guide has equipped you with all the knowledge you need to handle the job efficiently.