A wobbly, broken, or loose toilet seat hinge can be more than just a minor annoyance it can become a daily frustration or even a hazard. Fortunately, fixing or replacing a toilet seat hinge is a simple DIY task that requires only basic tools, a little patience, and a clear set of instructions. In this comprehensive guide, we will walk you through how to fix a toilet seat hinge step-by-step, whether you are dealing with loose screws, damaged hinges, or a seat that needs a total replacement.
Understanding the Components of a Toilet Seat Hinge
Before diving into the repair process, it's crucial to understand the basic structure of a toilet seat and its hinges:
Toilet Seat: Typically plastic or wooden, it is attached to the bowl.
Hinges: Usually made of plastic or metal, connecting the seat to the toilet.
Mounting Bolts: These bolts pass through the holes at the back of the toilet bowl and secure the seat.
Nuts or Wing Nuts: Found under the toilet bowl rim, holding the bolts tightly in place.
Tools and Materials Needed
To begin your repair, gather the following tools and replacement parts:
Flathead screwdriver
Phillips screwdriver
Adjustable wrench or pliers
Replacement toilet seat hinges or full seat (if needed)
Cleaning cloth
White vinegar or mild bathroom cleaner
Tape measure (optional)
Step 1: Inspect the Toilet Seat Hinge
Start by identifying the specific issue with your toilet seat hinge:
Loose seat: Often caused by loosened mounting bolts or worn-out hinges.
Broken hinge: If cracked or physically damaged, the hinge must be replaced.
Shifting seat: Indicates the bolts have lost grip or the holes have widened.
Tip: If the toilet seat is moving excessively, try tightening the bolts before proceeding with a full hinge replacement.
Step 2: Remove the Toilet Seat
To remove the toilet seat and access the hinges:
1. Pop open the hinge caps located at the back of the seat using a flathead screwdriver.
2. Unscrew the bolts with a Phillips screwdriver while holding the nut underneath with your hand or a wrench.
3. Once both bolts are removed, lift the seat and hinges off the bowl.
Note: Older models might have rusted or corroded bolts. Apply a few drops of penetrating oil and wait 10–15 minutes before attempting removal.
Step 3: Clean the Mounting Area
Use this opportunity to thoroughly clean the mounting surface of the toilet bowl:
Wipe away dust, residue, or mildew.
Spray the area with a vinegar solution or mild cleaner.
Dry with a clean cloth before proceeding to install new hinges.
A clean surface ensures better hinge grip and bolt stability.
Step 4: Replace or Repair the Hinge
If the hinge is broken:
1. Purchase universal replacement hinges or the exact model from your toilet seat’s manufacturer.
2. Align the new hinges over the bolt holes.
3. Insert the bolts through the hinge and into the toilet bowl holes.
4. Tighten the nuts beneath while ensuring the seat is properly aligned.
5. Close the hinge caps once tightened.
If the hinge is loose but not broken:
1. Tighten the existing bolts using a screwdriver while holding the nut below.
2. Add rubber washers or toilet seat stabilizers to help grip the seat better.
3. In some cases, applying a toothpick dipped in wood glue inside widened holes can help reinforce the bolt grip (for wooden seats).
Step 5: Align and Test the Toilet Seat
Once the hinge is secured:
Sit gently on the seat and shift slightly to test for movement.
Ensure that both sides are symmetrical and that the seat doesn’t rock or shift.
If movement occurs, recheck the bolts for tightness.
Tip: Don’t overtighten plastic bolts—they can crack easily under too much pressure.
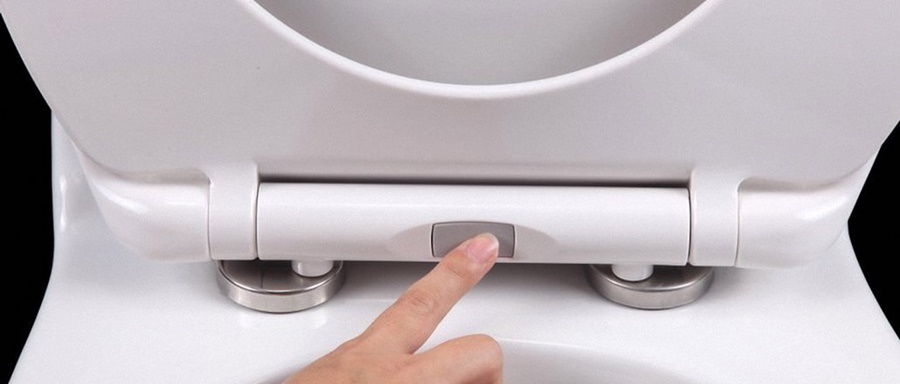
Special Cases: Soft-Close or Concealed Hinges
Modern toilet seats often come with soft-close or hidden hinge systems, which may require a different approach.
Soft-close hinges:
These are often spring-loaded and need to be aligned precisely.
Follow manufacturer instructions for detaching and installing.
Clean the hydraulic components carefully if malfunctioning.
Concealed hinges:
Access is typically gained by sliding or popping off a cover plate.
You might need a specialty screwdriver or Allen key.
These systems often use hidden locking tabs, so inspect closely before forcing components open.
Preventing Future Hinge Problems
To keep your toilet seat secure and long-lasting:
Check bolt tightness every 3–6 months.
Avoid standing or putting excess weight on the toilet seat.
Use nylon bolts and anti-slip washers for added durability.
Clean hinges regularly to prevent gunk and rust buildup.
When to Replace the Entire Toilet Seat
In some cases, it’s more efficient to replace the entire toilet seat rather than just the hinge. Consider replacement if:
The seat is cracked, discolored, or warped.
The hinges are integrated and non-replaceable.
You want to upgrade to a soft-close or bidet seat.
Installation is typically the same—just follow the manufacturer’s instructions, ensuring bolt alignment and tight fastening.
Recommended Toilet Seat Brands and Hinge Types
When choosing a replacement, consider:
Bemis: Known for durable plastic hinges and easy installation.
Kohler: Offers premium soft-close seats with concealed hardware.
TOTO: High-end features, including bidet compatibility and quick-release hinges.
Mayfair: Offers both wood and plastic seats with adjustable hinges.
Hinge Types to consider:
Top-fix hinges (screw in from the top great for inaccessible undersides)
Bottom-fix hinges (standard type, screw from underneath)
Quick-release hinges (for easy cleaning and removal)
Soft-close hinges (prevent slamming, extend lifespan)
Conclusion
Fixing a toilet seat hinge is a straightforward task that anyone can perform with the right guidance. Whether you're tightening a loose hinge, replacing a damaged part, or upgrading your toilet seat altogether, following the detailed steps above ensures a secure and comfortable bathroom experience.
With a few tools and a small investment of time, you can restore your toilet seat to like-new condition, eliminate annoying wobbles, and maintain proper hygiene.