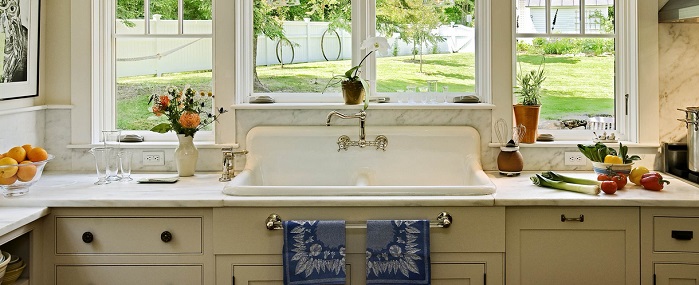
The kitchen faucet is an excellent fixture used in any home. It is used for washing dishes, cleaning produce, and even filling up pots for cooking. As such, it is important to choose a faucet that is not only functional but also stylish and durable. Regarding kitchen faucets, there are two main options: single-handle and double-handle. Single-handle faucets have one lever that controls the flow of water and the temperature, while double-handle faucets have separate handles for cold and hot water.
Pros and Cons of Single-Handle Kitchen Faucet
Pros
- Easy to use and adjust
- Sleek and modern design
- Requires less space on the sink
- Energy efficient
Cons
- Limited water flow control
- Difficult to adjust the temperature precisely
- May not be suitable for households with children or elderly individuals.
Installation Process
Here are the general steps to install a single handle faucet:
- You will need a basin wrench, adjustable wrench, pliers, Teflon tape, and the new faucet.
- Locate the shut-off valves under the sink and turn off the water supply to the faucet.
- Disconnect the water supply lines from the faucet using pliers. Use a basin wrench to loosen the nuts that secure the faucet to the sink. Lift the old faucet off the sink.
- Clean the surface of the sink where the new faucet will be installed to remove any debris or old putty.
- Place the gasket provided with the new faucet on the sink surface.
- Secure the mounting plate over the gasket and onto the sink using screws provided with the new faucet.
- Insert the tailpiece of the new faucet into the mounting plate. Secure the faucet onto the sink with a mounting nut provided with the faucet.
- Attach the hot and cold-water supply lines to the faucet using pliers. Use Teflon faucet on the threads of the supply lines for a tight seal.
- Turn on the faucet and check for proper water flow and temperature.
Maintenance Tips
Clean the Faucet Regularly
Use a mild soap and warm water to clean the faucet. Avoid using harmful chemicals, as they can damage the finish of the faucet.
Check for Leaks
Check the faucet for leaks regularly. If you notice any leaks, replace the damaged parts immediately. Even a minimum leak can lead to significant water wastage over time.
Replace the Cartridge
The cartridge is the piece of the faucet that regulates the water flows. Over time, it can become worn or damaged, leading to leaks or reduced water pressure. If you notice any issues with the water flow, consider replacing the cartridge.
Lubricate the Cartridge
If you have hard water or live in an area with high mineral content, the cartridge can become stiff or difficult to turn. Lubricate the cartridge with silicone grease to make it easier to turn.
Check the Aerator
The aerator is the part of the faucet that adds air to the water flow, making it more efficient and reducing water usage. Over time, the aerator can become clogged with mineral deposits. Remove the aerator and clean it regularly to ensure optimal water flow.
Pros and Cons of Double-Handle Kitchen Faucet
Pros
- Provides precise temperature control
- Traditional and classic design
- Easy to repair and replace parts
- Suitable for households with children or elderly individuals
Cons
- Takes up more space on the sink
- Requires more effort to adjust the temperature and water flow
- May be less energy efficient
Installation Process
- Turn off the connection of the water supply to the sink. You should be able to locate the shutoff valves under the sink. If not, you may need to turn off the main water supply to your house.
- Remove the old faucet and any mounting hardware. This may require a wrench or pliers to loosen any nuts or screws.
- Clean the sink surface thoroughly to remove any old caulk or debris.
- Place the rubber gasket or mounting plate on the sink to provide a seal between the faucet and the sink.
- Insert the faucet into the mounting holes on the sink. Be sure to line up the hot and cold-water supply lines with the corresponding faucet handles.
- Attach the faucet to the sink with the mounting hardware provided. This may include nuts, screws, or a locking plate.
- Attach the water supply lines to the corresponding hot and cold-water connections on the faucet. You may need to use Teflon tape or plumber's putty to ensure a tight seal.
- Turn on the water supply connection and test the faucet for any leaks or issues. Adjust the handles as needed to control the flow and temperature of the water.
- If everything is working properly, apply a bead of silicone caulk surrounding the base of the faucet to provide a seal and prevent water from seeping under the sink.
Maintenance Tips
Regular Cleaning
Clean the faucet regularly with a soft cloth and mild soap to prevent mineral buildup and tarnishing.
Check for Leaks
Check the faucet for leaks by turning it off tightly and observing if any water continues to drip. If you notice any leaks, tighten the faucet or replace any worn-out parts.
Replace the O-Rings
Over time, the O-rings in the faucet can wear out, causing leaks. Replace the O-rings periodically to prevent leaks.
Lubricate the Cartridge
If the faucet handles are hard to turn, it may be due to a worn-out cartridge. Remove the cartridge, lubricate it with silicone-based grease, and reinstall it.
Inspect the Aerator
Remove the aerator from the faucet and check it for mineral buildup. Clean or replace the aerator as needed to restore proper water flow.
Adjust the Water Pressure
If the water flow is too high, it can induce damage to the faucet and pipes. Adjust the water pressure to a safe level to prevent damage.
Conclusion
Choosing between a single-handle and double-handle kitchen faucet ultimately comes down to personal preference and specific household requirements. Single-handle faucets offer easy operation and a modern look, while double-handle faucets provide precise temperature control and a classic design. Whichever option you choose, make sure to follow the installation and maintenance tips to ensure your faucet lasts for years to come.